Thanks Rob. I will open my BB back up and check the wiring I done to make sure I have the wires in the right place and you’re right about making sure everything is grounded properly. You never know when a freak thing might happen. I have gotten shocked on stage plenty with a reverse ground on a microphone. It generally gets you right on the lip and it’s not comfortable. Thanks for sharing the picture.
Sincerely, Fingerstylepicker.
Thanks FSP - glad you survived the stage shocks and are here to enjoy your BB!!!
Thanks again for the pic Rob… just to clarify… in your photo, which wire did you designate as the ground… Black?
Hi guys,
So I’ve just completed the Norbert Hack (thanks to Rob22315 for the pic). One issue that I have now… I have a Zoom FS01 pedal that I thought would work perfect for this. However, when I plug it in the pedal works in exactly the opposite way that it should. If I hold the pedal down, it runs the main BB loop. If I quickly release and re-press the pedal, it triggers the Fill, and if I completely release the pedal, the transition fill continues until I press the pedal again. Obviously my first thought was to try and reverse how the internal switch works inside the FS01 pedal, but I have no idea if that would work. Do any of you wiring experts know if that type of switch can be reversed? I’ve included a photo of the wiring in the pedal. There are 3 leads for the switch… only the bottom two are connected (Black to middle, Red to bottom). [ATTACH=full]3336[/ATTACH]
Never mind guys… I moved the red wire to the top lead and everthing seems to work great. I would have just deleted my last post, but I thought I’d leave it there for anyone else who might come across the same issue. Cheers!
You would have to setup the internal switch on the Beat Buddy to function as a push on. The default is set up to trigger on release making your switch work opposite. You would not have to change the wiring at all. The only problem with this is that you lose other functions associated with the switching arrangement. The remote pedal that you plug into the jack for your switch would have to be “Normally Closed” to operate properly with the default setting on the main pedal switch. A least this goes for what I see in the picture. I hope this is not confusing.
Sincerely, Fingerstylepicker.
Does the BB external footswitch work full function like the main pedal after doing the Y cable hack, or do I need a 3 switch pedal?
Hi all,
I appreciate all the info and this really was a lifesaver hack.
Can anyone who have used the FS3X from digitech please give a description on the wiring?
or do i just rip everything out and start from scratch rewiring it for my BB and just fit a new socket to connect to my BB hack?
Thanks
I messed up my main pedal doing this hack, but at least the new remote pedal works! Be careful when drilling the hole!
I may be overlooking something, but this hack lost its appeal to me when the new firmware allowed me to do what I need to do with the external footswitch. i.e. no double tapping needed and make the external footswitch behave like the main switch etc.
Hey Norbert, I’m Norbert too. Don’t see our name too often. AND a BB user. Thanks for the hack.
I’m late to the party here, but you can call Mesa directly. They actually have a “Vintage” service dept. I sent my Studio Caliber to them for repair and they did an awesome job with it!
Hi All! Judging by the dates of the posts on this thread, I’m a little late in the hame but I was wondering if anyone still active in the forum can help?
Due to a physical disability I would like to add a remote switch to the main BB pedal. I already use the remote footswitch and midi maestro for other purposes and really need an additional for the main.
I’m thinking converting the 1/8" headphone jack would be the easiest for me to accomplish… My biggest challenge is that all the photos that had been posted on these old posts no longer show. If anyone could repost I’d greatly appreciate it. I am just looking for the two contact points on the back of the PCB to connect the switch.
I have two BB pedals and I’ve yet to open them up. One seems to be the newest model that has been produced and the other is an older model. I’m uncertain if there is any difference on the boards.
Many thanks in advace for any help.
I think the video in the first post shows the connections to the main switch in the BeatBuddy. Is that what you’re looking for? I took a couple of screen shots from Norbert’s video:
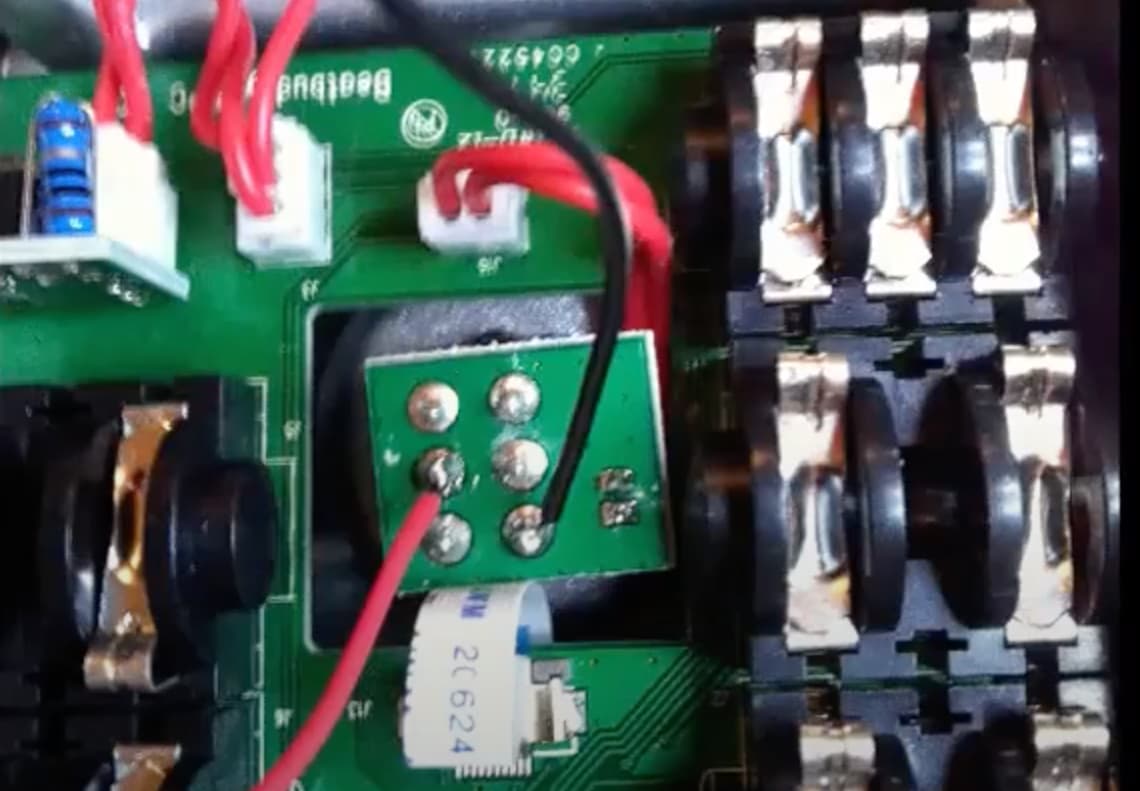

Keep in mind that the photos from Norbert’s video work for the older BB but did not work for newer ones. I had to fiddle with it over and over until finding the right combination to solder for the new one.
It can be simple, instead of soldering the wires to the switch, solder them to the points where the two wires are soldered on the little pcb. (the two solder points on the right)
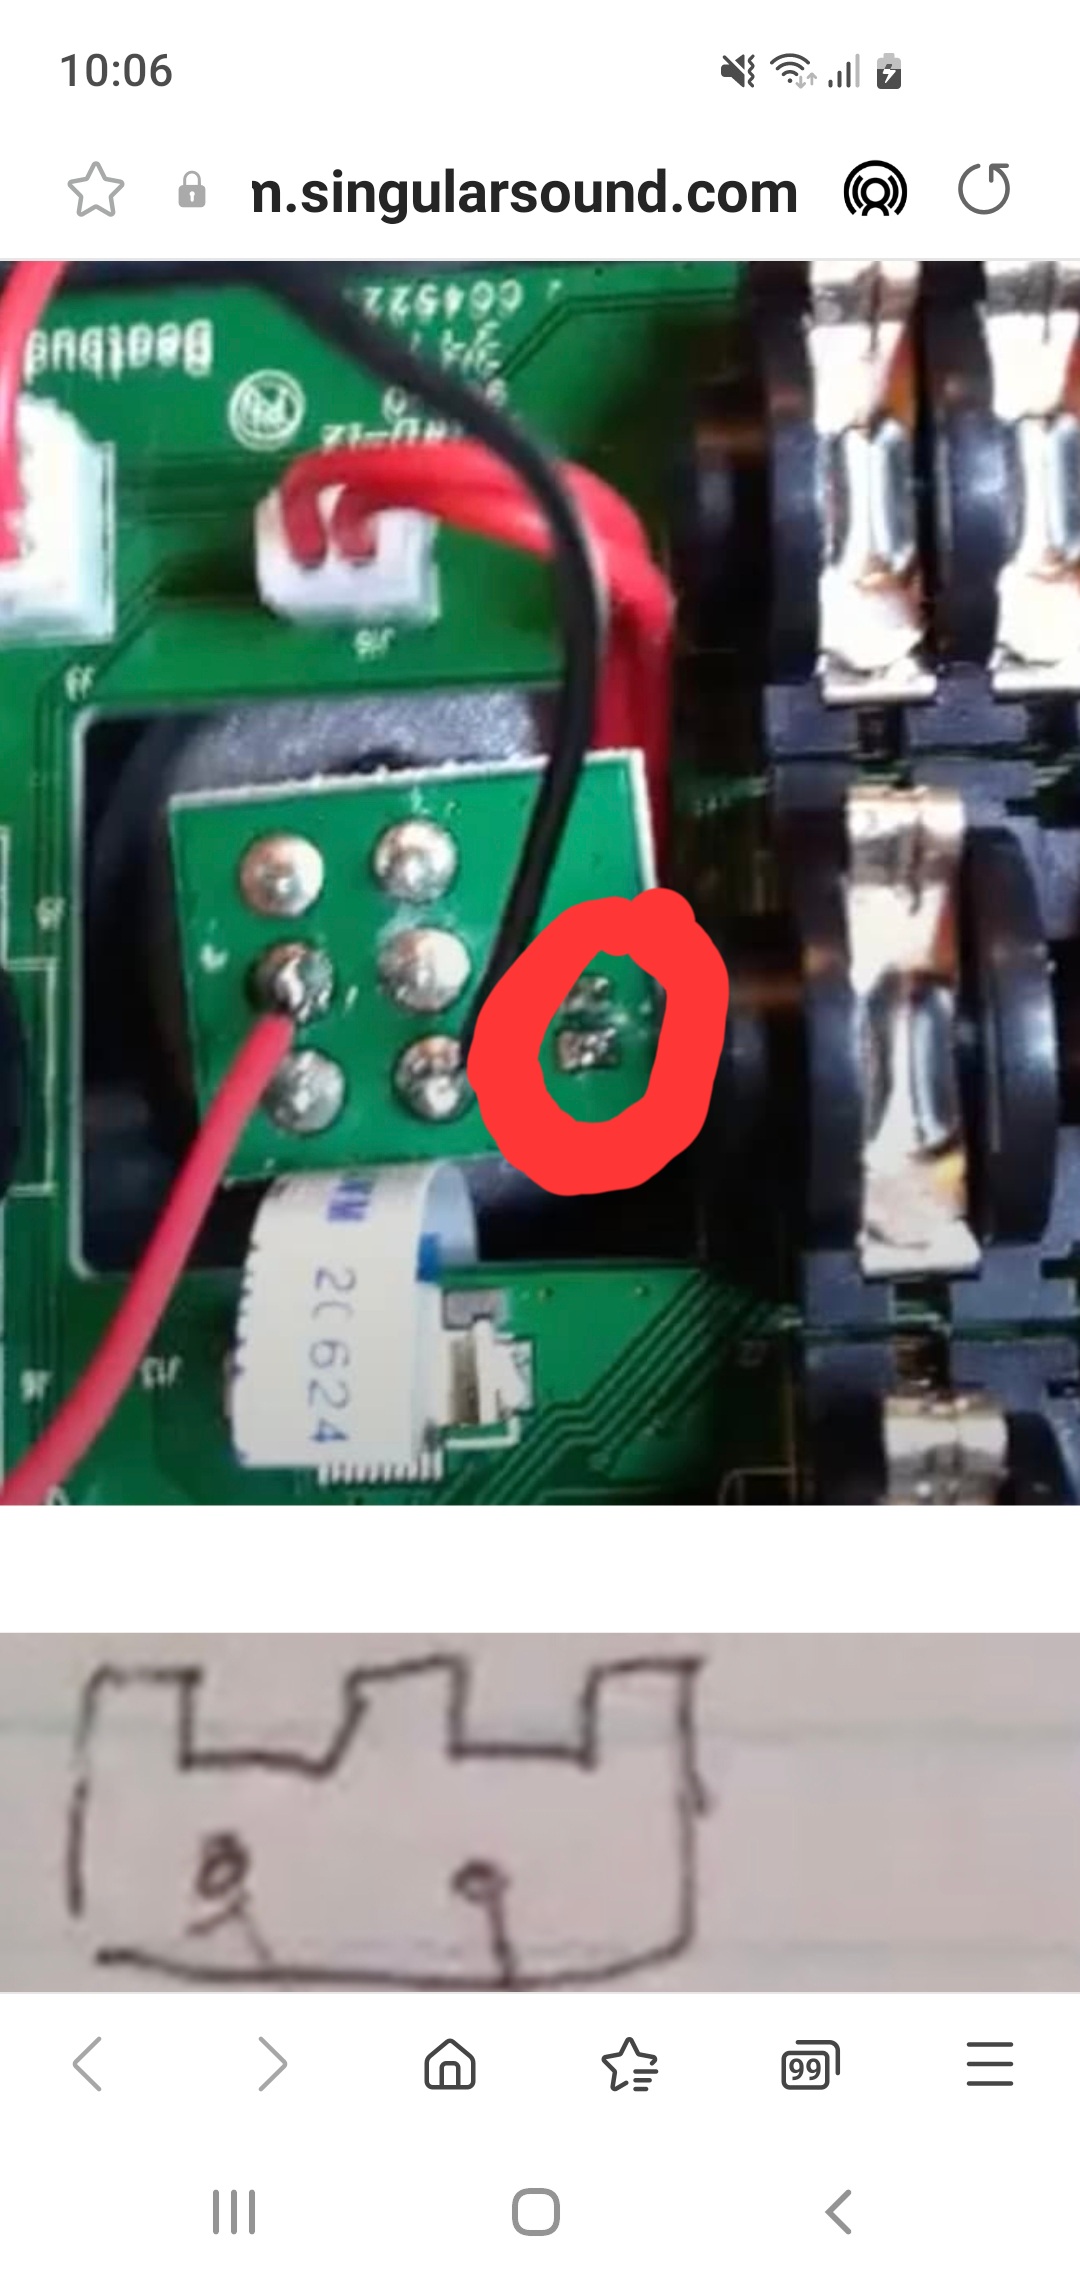
yes those two, positive or negative does notmatter in this case as long as you use an isolated jack
Many, many thanks! I plan to try to use existing 1/8" headphone jack with a two-pin connector to the jack. I think, if my idea works, it is a matter of getting the correct two pins for a mono cable. I’m not sure if what I’ve written makes any sense.
I understand, maybe you already know but you have to use a momentary switch for your project