Good morning… Can you tell me where I can purchase a new switch and an additional backup switch for my BeatBuddy? I would like to get replacement ordered as soon as possible.
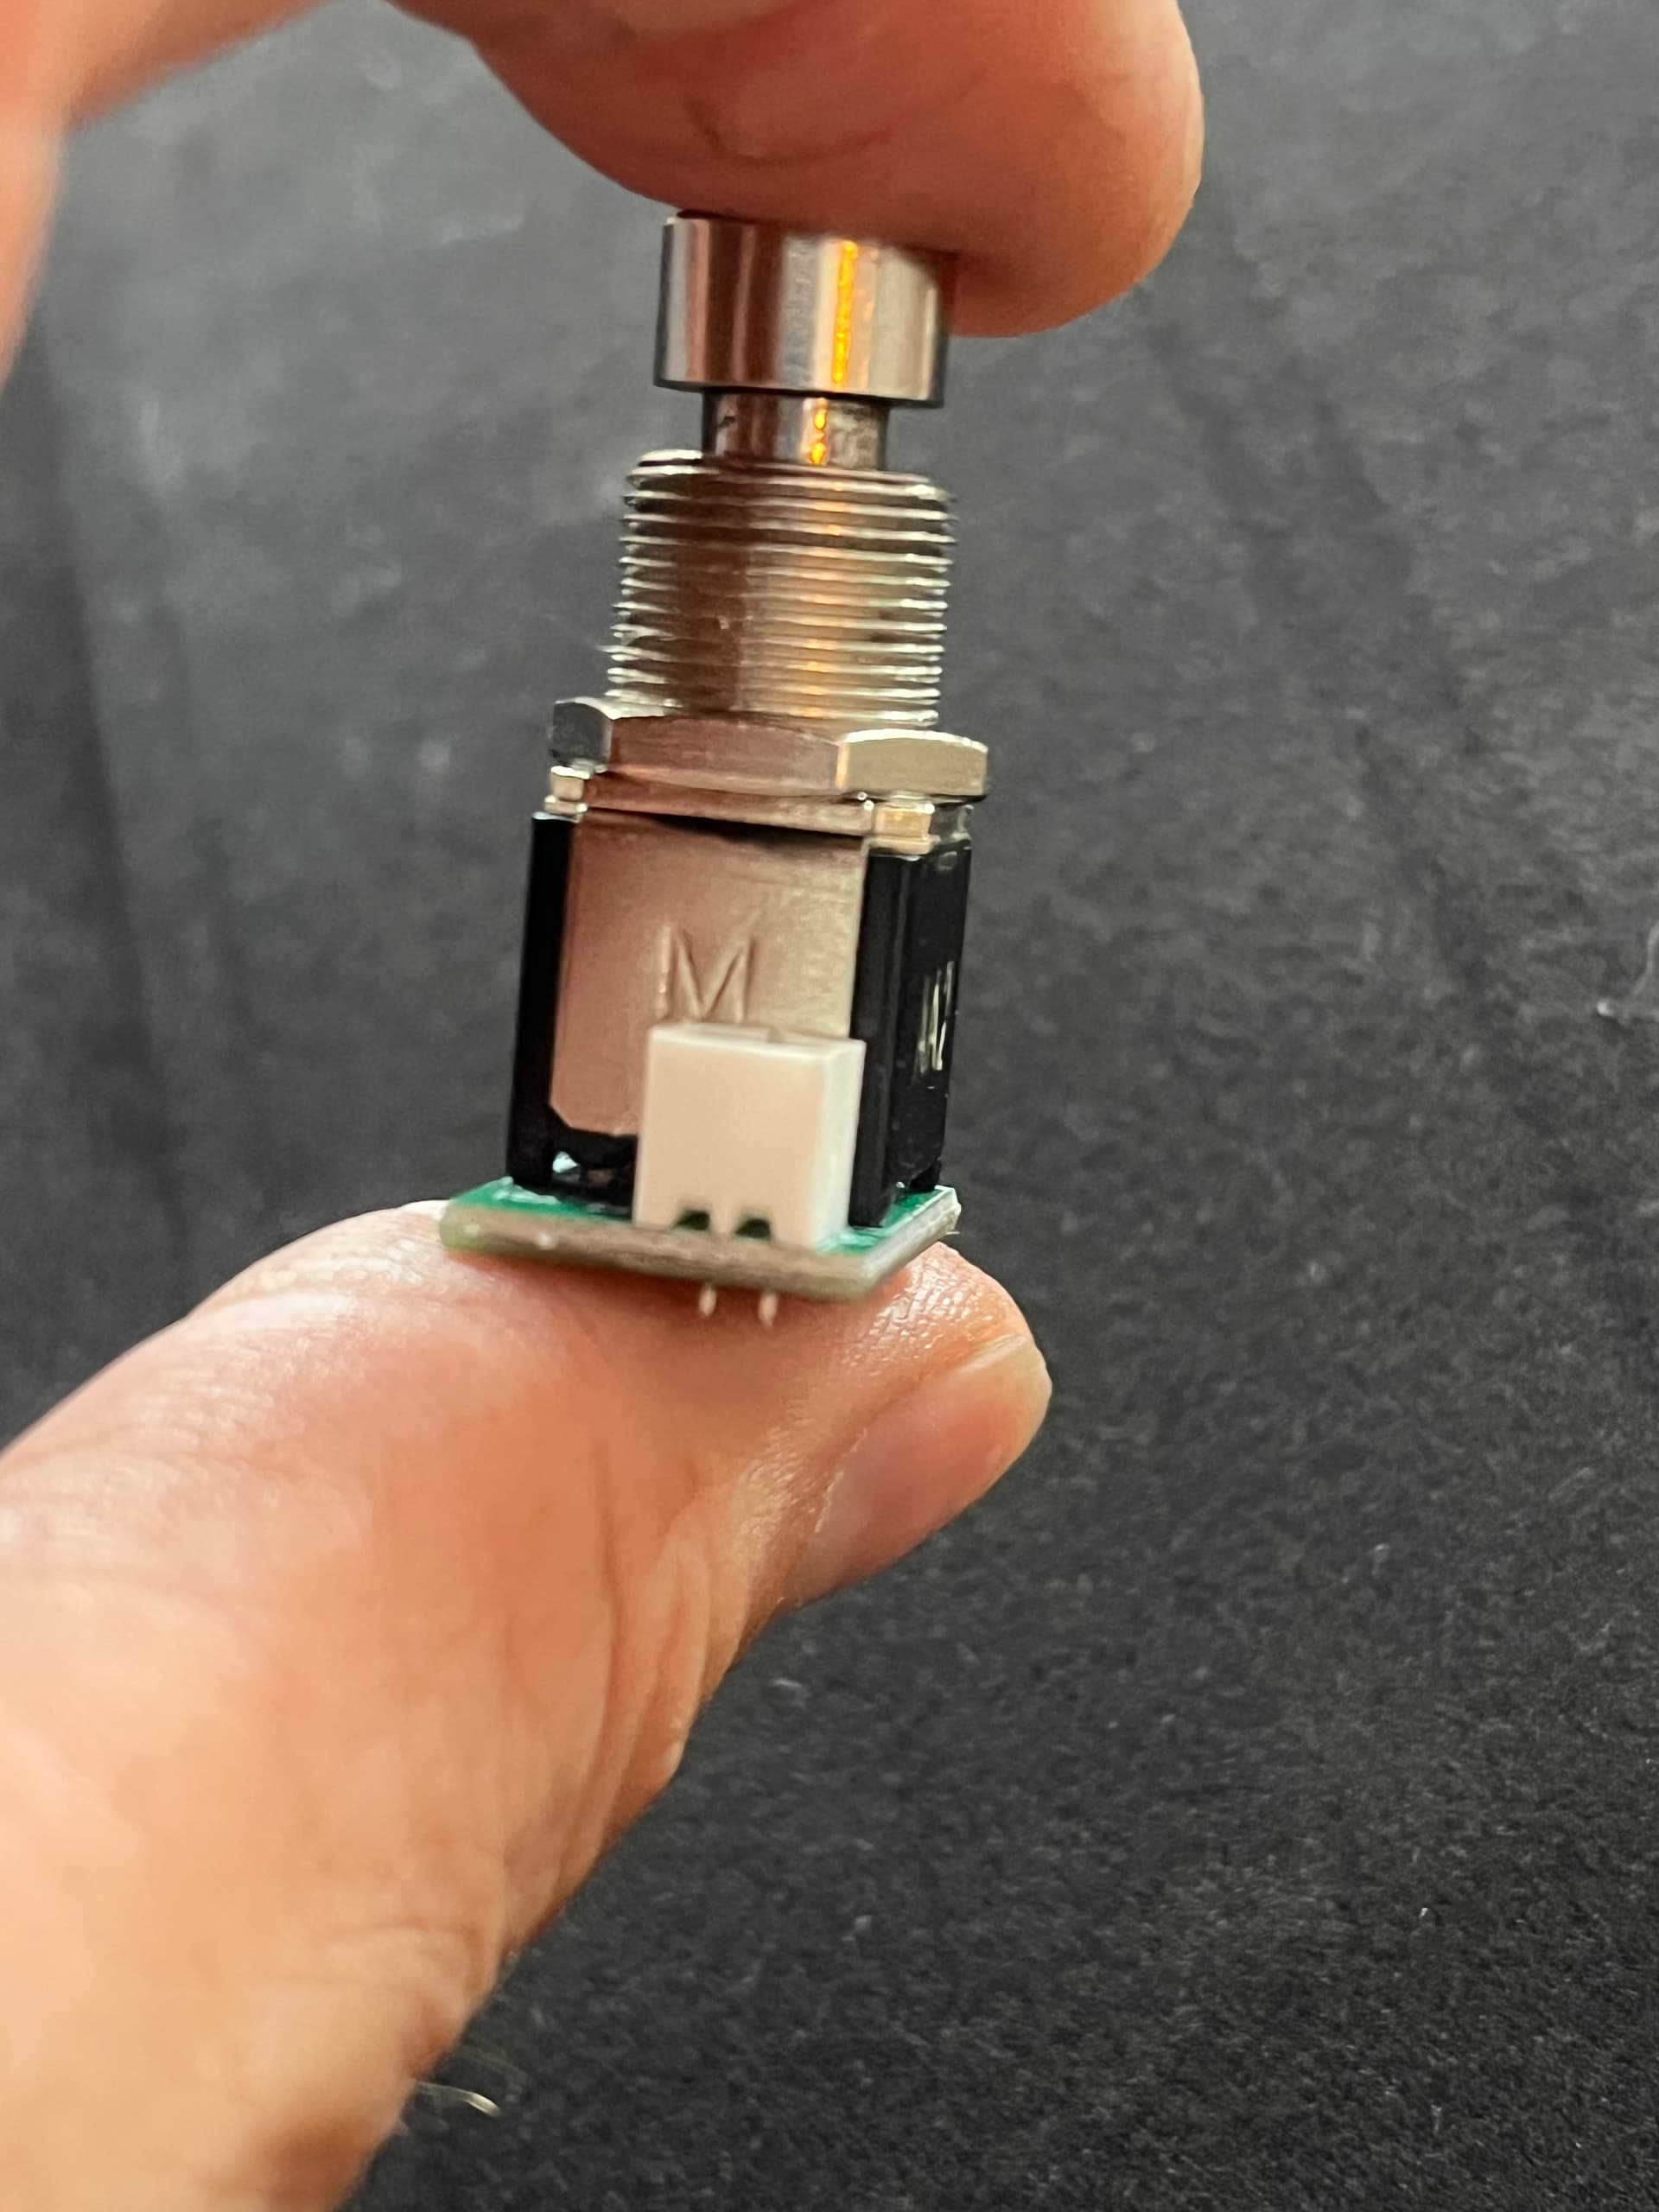
This is the main switch, not for the external foot switch.
I do have a back up BeatBuddy that I am using. But, I would like to get it ordered and replaced ASAP.
The M in the part number supposedly stands for momentary which probably does not click. If the part number has an L instead of the M, it means that it’s a latching (noisier) switch.
This switch is from Mouser (US parts seller). I have used them for replacement parts. Shipping may be a bit steep and I usually make order up to justify the shipping cost
There is a difference in the suffix of the part number ‘050’ vs ‘011’ which the data sheet does not define (that I could find). If you can find the difference it may work as a BB replacement switch. The data sheet is downloadable in the link.
I’d believe there’s a 98% chance the switches linked below are the same as what is in the BB. The data sheet link appears to reflect the same correct part number for the BB replacement. These two online retailers I think may be one and the same. Both in Tempe, AZ USA. It’s been a while, but I have ordered guitar parts from Antique Electronic Supply and they were good.
Yes…it’s taken this long to get a new switch placed!!! After months of patiently waiting for the new switch to arrive from England, they never arrived. I contacted the seller and promptly received my money back from the eBay seller. I ordered a new switch from Amplified Parts (Thanks MarkF48). The switch works fine but does make a clicking sound. It is not a silent switch.
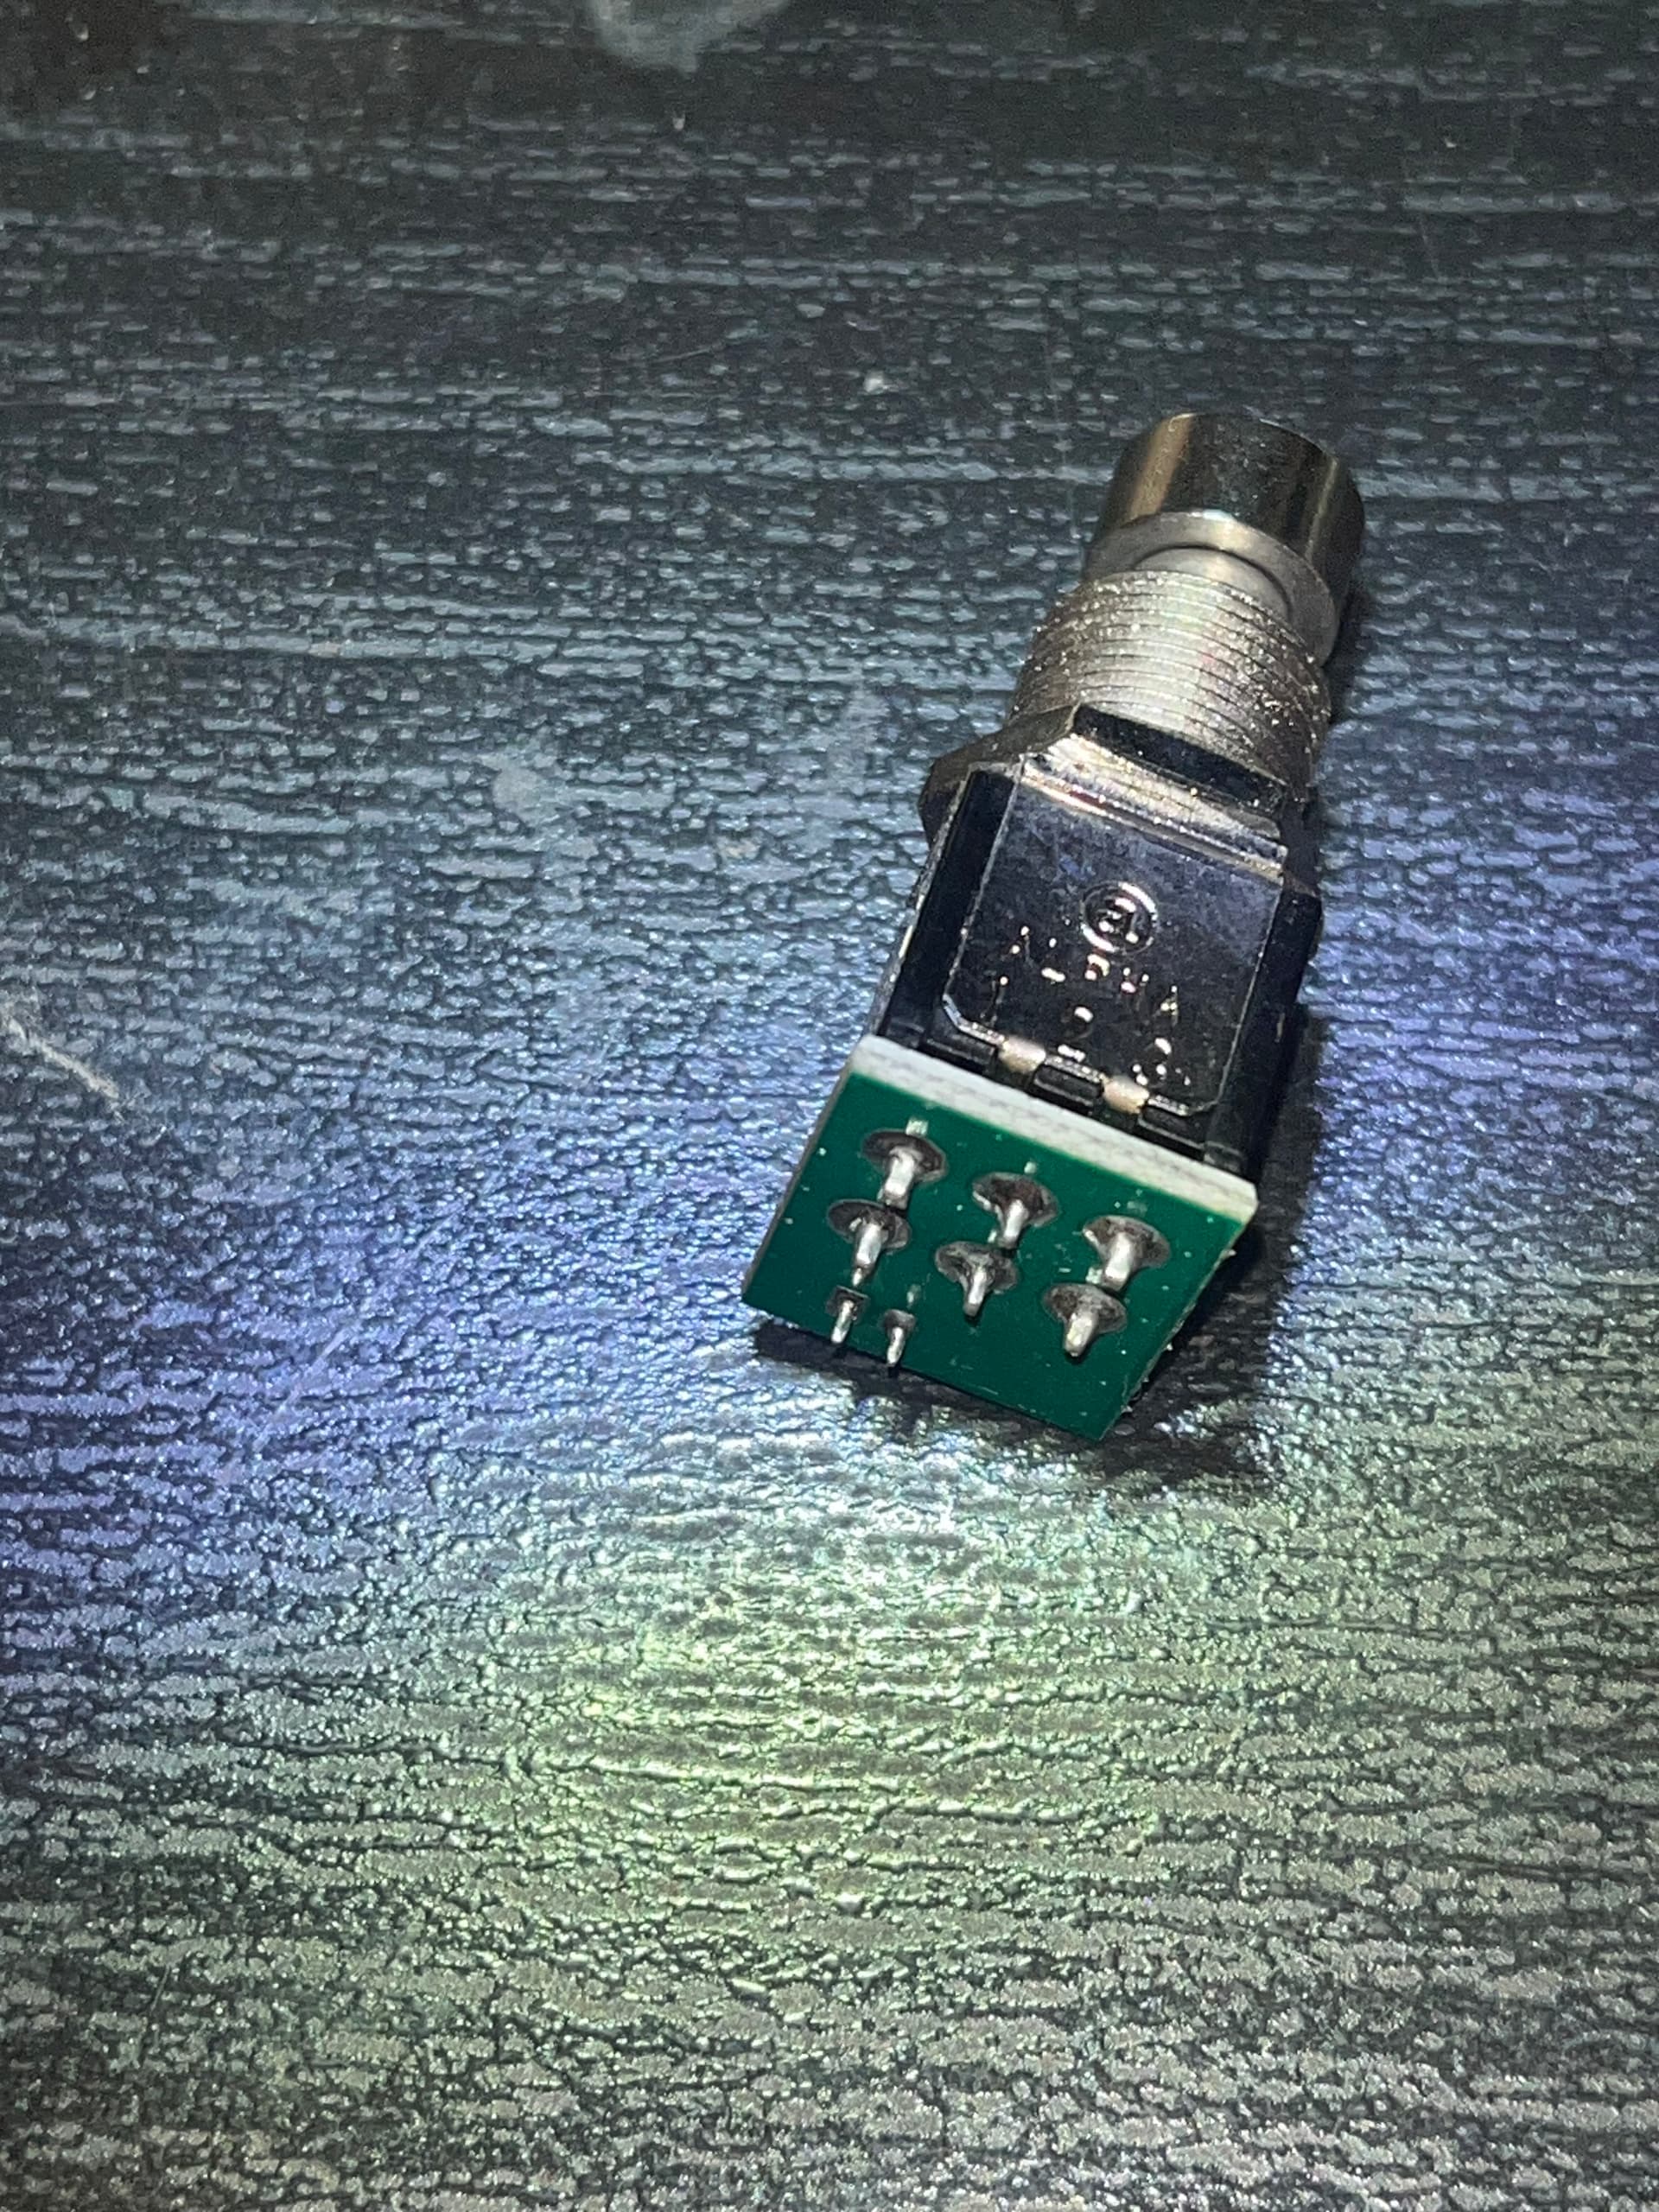
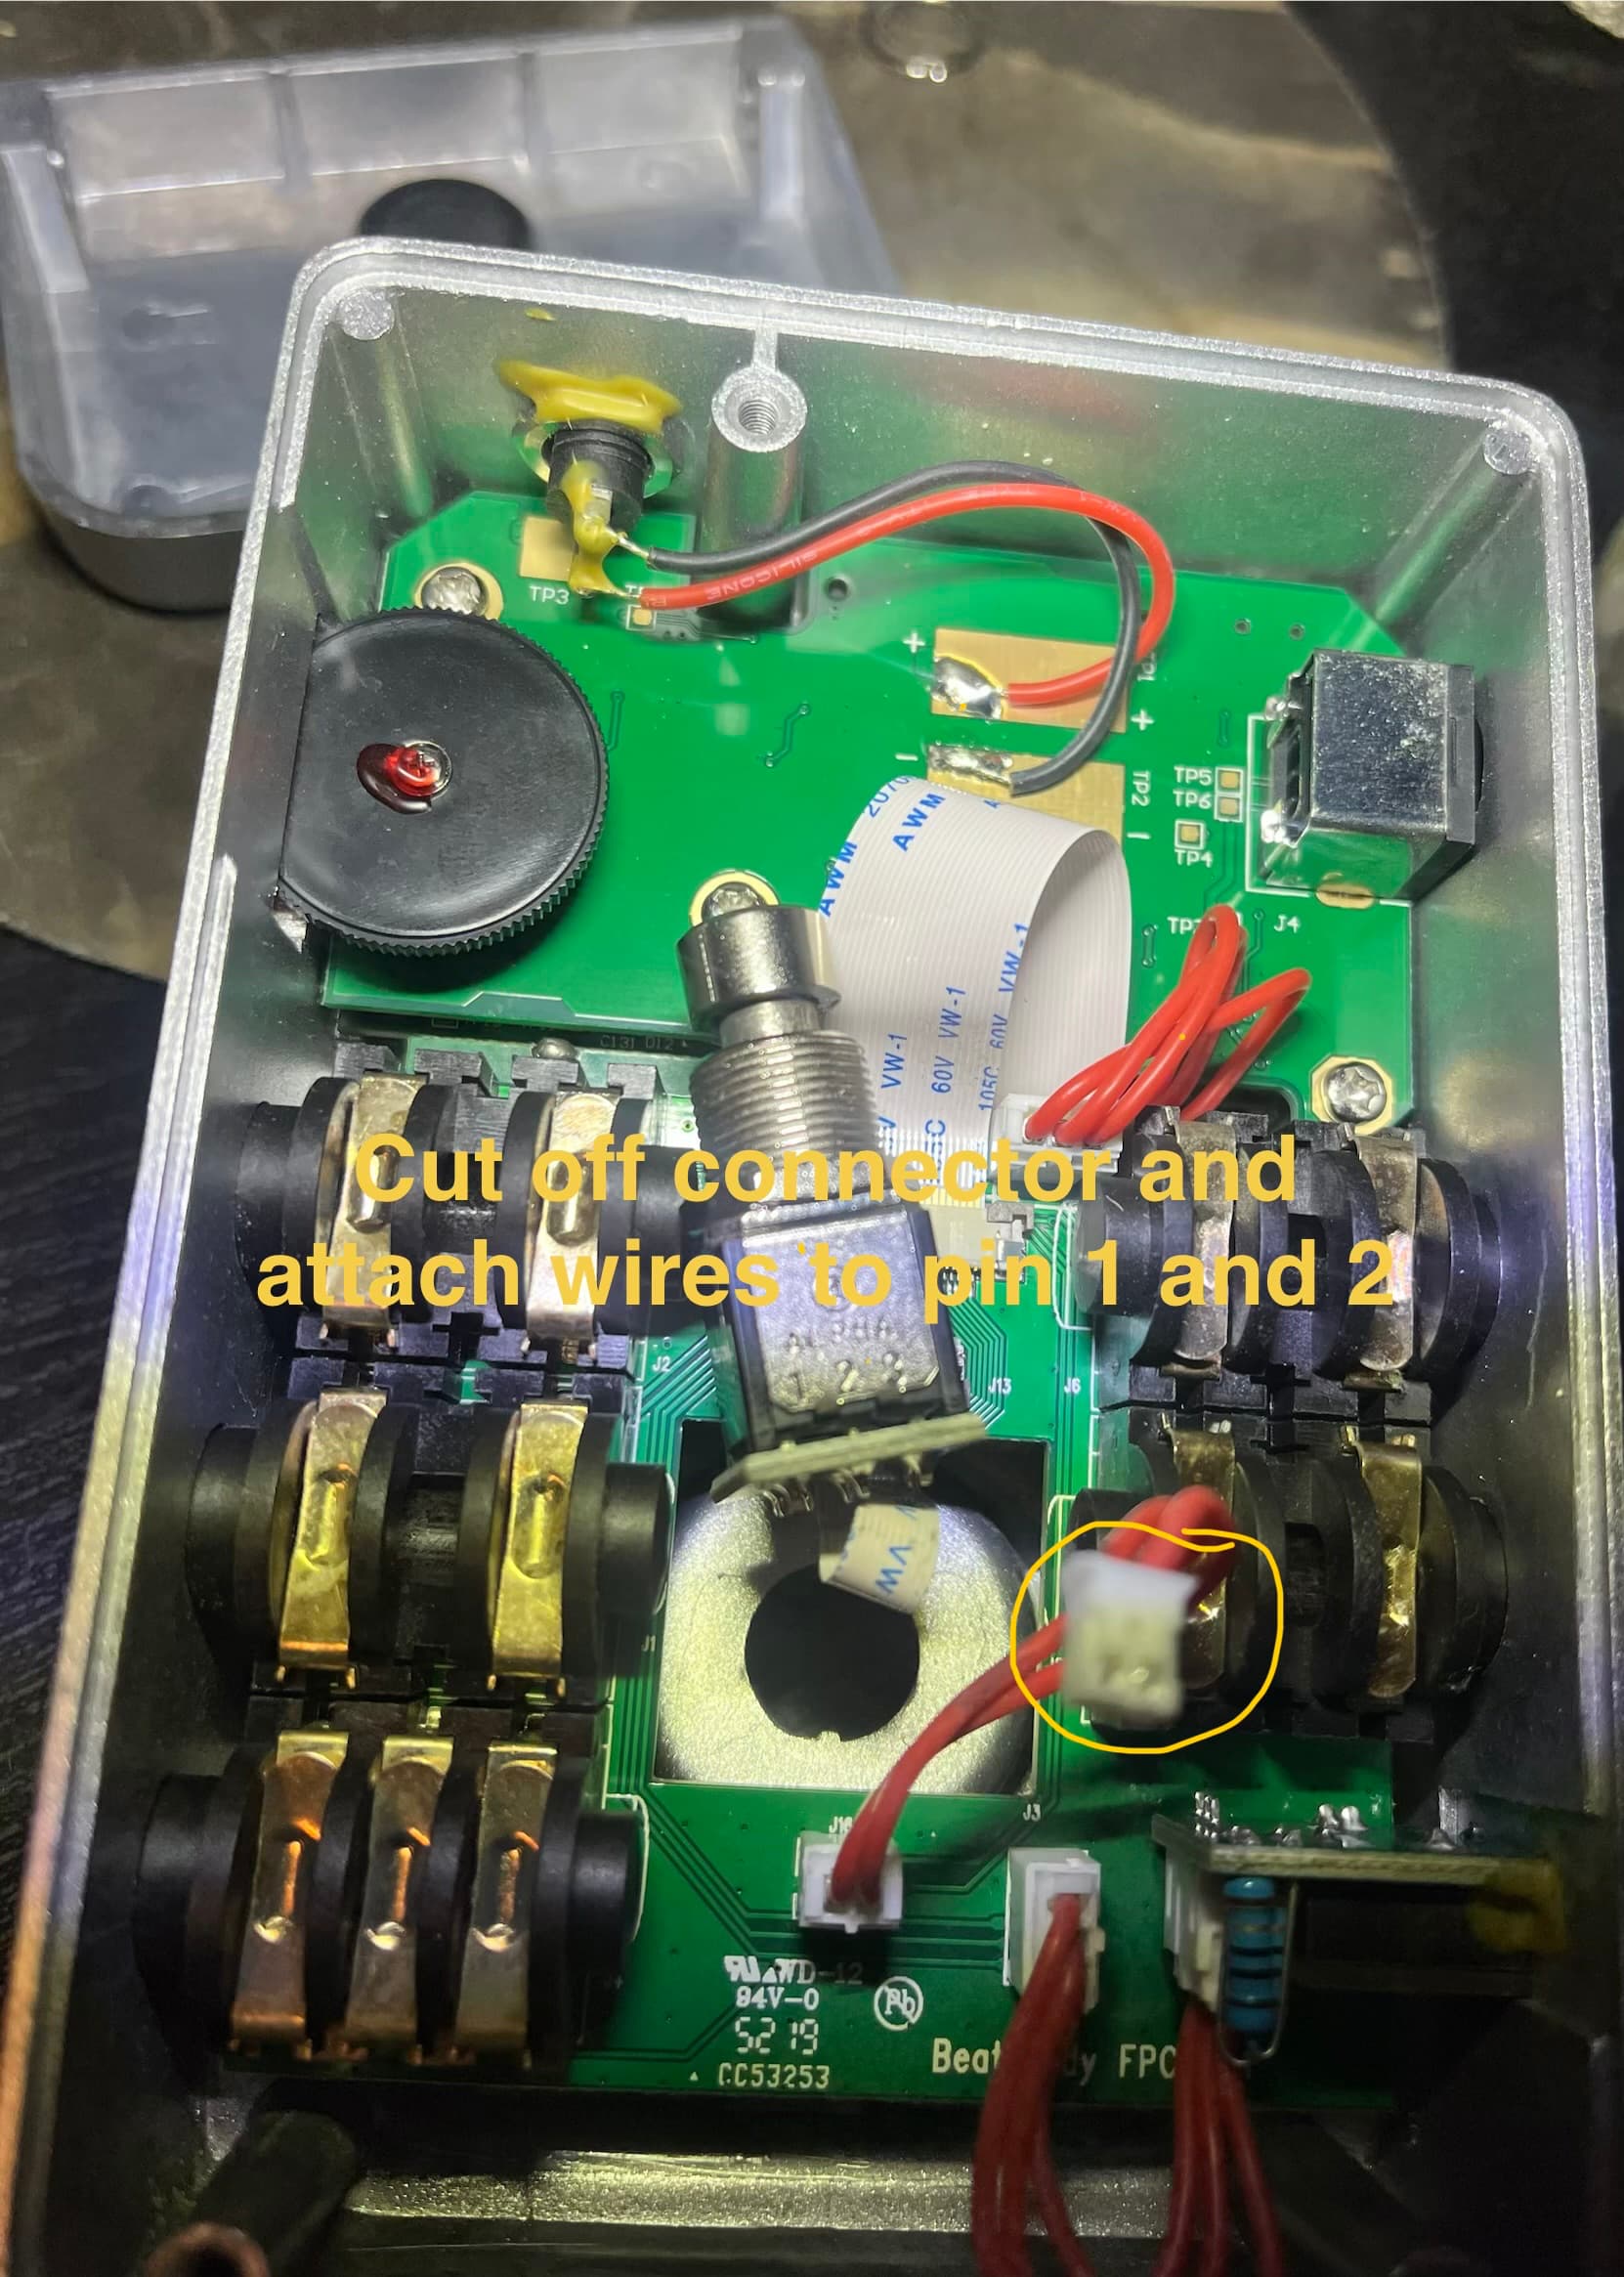
I had one issue…While removing the switch, I damaged the board it was to attach to . After researching the switch schematic, I just soldered the two wires that plug originally in to the board to pins 1 and 2 of the switch. I discarded the board that originally was intended to attach to the switch. It works great now.
If you damage or if you’re not using the board. Discard the board.
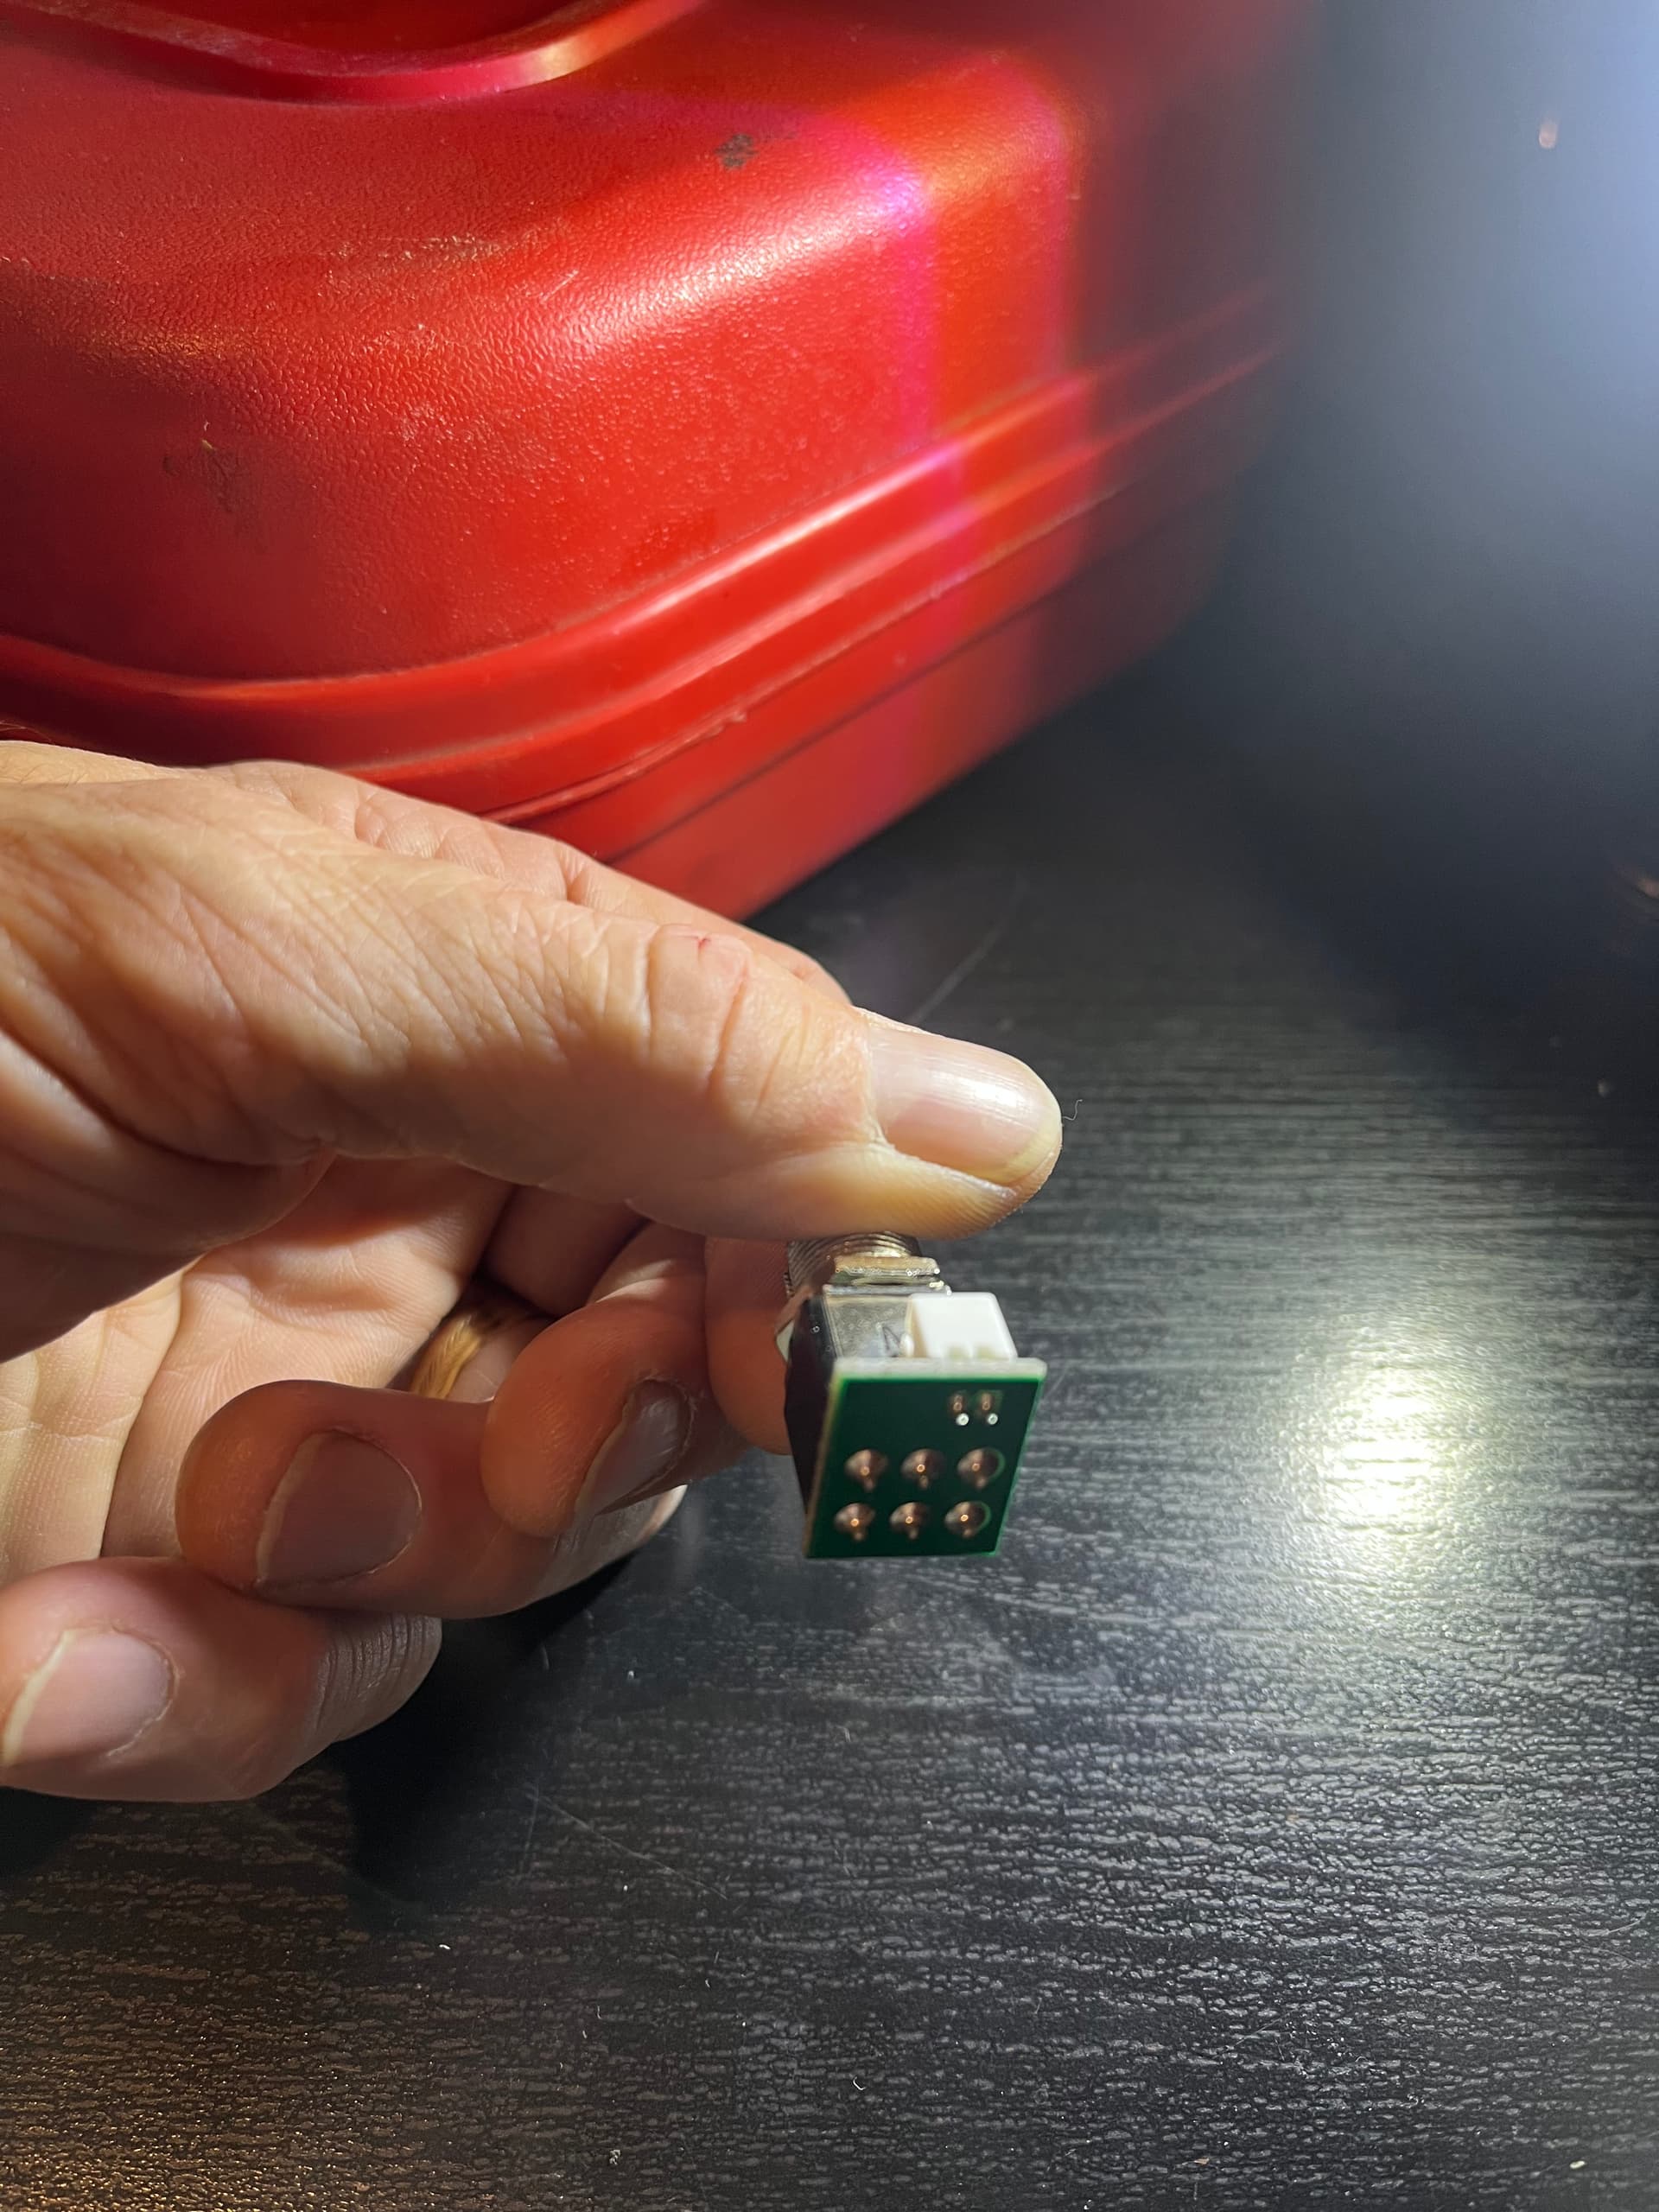
Remove the plug connector end.(circled in the photo below)
Attach one wire to pin 1 and the other to pin 2 of the new switch. (It doesn’t matter which wire goes to pin 1 or 2.)