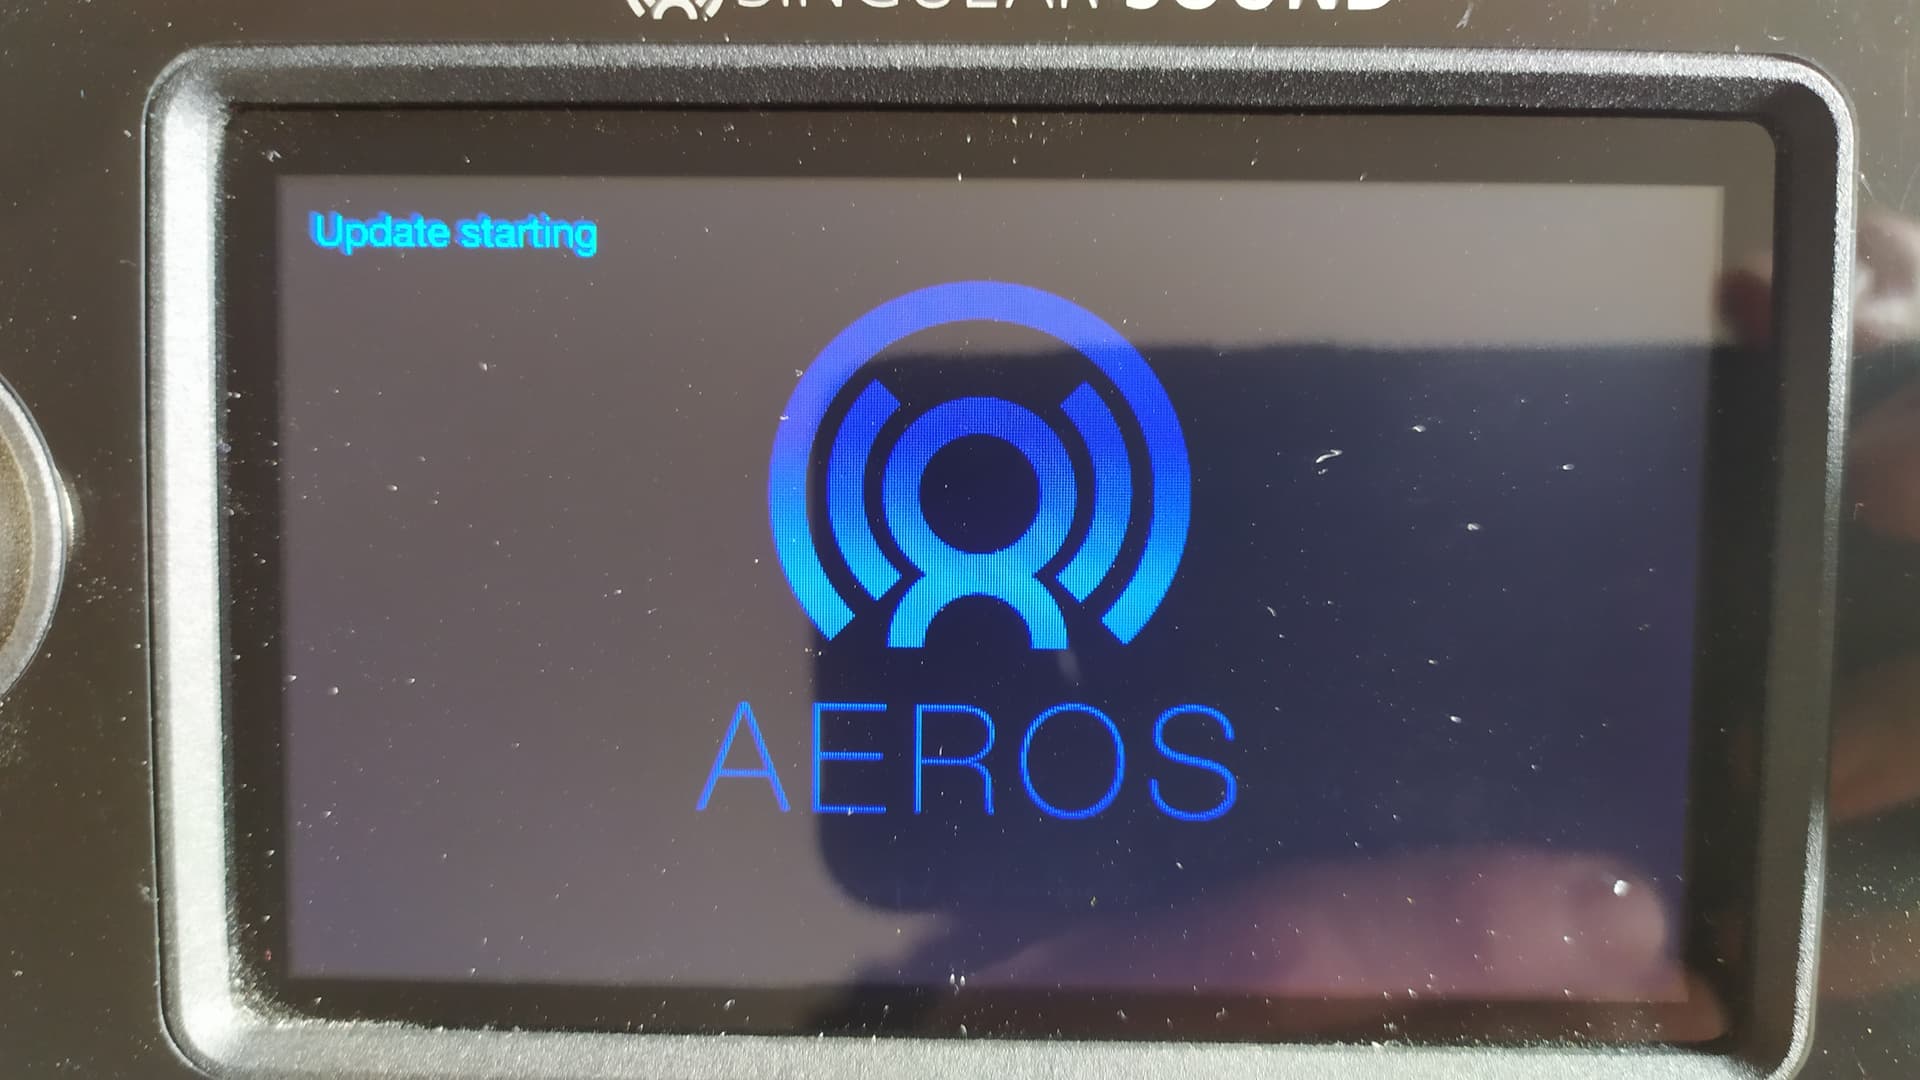
Greetings Aerosnaughts!
EDIT (March 31, 2023): Version 5.0.3 is no longer beta and is now available for download over WiFi!
If you have any trouble downloading over WiFi you can use the SD card update method (details below) and get the update file at this download link.
We have updated the Aeros Manual and the Printer Friendly Aeros Manual (less dark colors for less ink use).
This version is more than just a big update, it is the vision of what the Aeros was meant to be and what it can be as a looper and live performance machine. We have been working on this for a long time, and though it is not perfect (yet), we are incredibly proud of how far we’ve come.
We have completely redesigned the UI of the looper to be hands-free, organized, and just all-together beautiful, as well as building many much requested features.
This version has major changes to the filesystem and the song meta files which requires conversion of songs recorded in previous versions. Please follow the directions in this post below to ensure your content is backed up and you can test safely and happily!
Video Overview of the New Features:
 w/ Joe Vitale")
New Features:
1. Autoquantize
Turn on Autoquantize mode by choosing the ‘Auto’ option in the ‘Song Grid Mode’ song setting when creating a new song or editing an empty one. A song can either be Quantized, Freeform or Auto.
Autoquantize mode will create a Quantized song out of a freeform recording you make live. It does this on the fly!
The Aeros uses an algorithm to define the tempo of the recording you just made based on the start and stop point of your recording.
If you know how long your first track in the song part will be, you can use the ‘Set Length’ setting to decide how many measures the recording will be quantized to. This makes it possible to get a tempo within the 40-300BPM range. Set length can be a maximum of 16 measures.
If you do not know how many measures long your first track in the song part will be, make sure to have Set Length on Auto. If set to Auto, the Aeros will quantize your track to be either 1, 2, 4, 8, or 16 measures in a Tempo range that you can set yourself. To set the Tempo Range use the ‘Auto BPM Range’ setting, the most common setting is 80-160BPM.
If the Multi-tempo song setting is enabled, you will set the Aeros to Autoquantize the first track of every part. If it is disabled, the Aeros will only Autoquantize the first track of the very first part and all other tempos in the other song parts will be based on that first song part tempo.
You can use the Aeros as the MIDI Transmitter (MIDI Master) while in an Autoquantized song to control a device, like the BeatBuddy, to start playing back as soon as the track recording is started or committed and the Tempo (BPM) is set.
This makes for a very cool effect where you can come up with an idea on the fly and your drummer already knows the tempo and song form! We suggest setting the Start: 1st Recording to Rec Start (Settings > MIDI >MIDI Out) to send the MIDI Start command once the recording is committed.
To send MIDI Stop every time the Aeros changes to an empty song part you can enable the ‘Send Stop at Empy Part’ setting in the MIDI Out settings (Settings > MIDI > MIDI Out). You may want to do this to stop any drums or playback devices while you record a new autoquantized track in a new part. You likely would not want to hear the drums until your track has been recorded and the new tempo is set in the new song part.
2. MIDI Transmitter (Master)
When the ‘MIDI Mode’ is set to Transmitter (MIDI Master), the Aeros will send its own internal clock, time signature, transition, Start and Stop commands to the MIDI Output. These behaviors can be individually turned off in the MIDI In or Out Settings (Settings > MIDI >MIDI Out/MIDI In). When in MIDI Transmitter Mode, the Aeros will also ignore the incoming clock but will still respond to any incoming CC commands that are not filtered.
Additional optional MIDI Out behaviors:
- Sending a command every time a track recording, playback, or overdub starts (Settings > MIDI > MIDI OUT > RPO Command)
- Sending MIDI Start at the start of the recording or once it commits (Settings > MIDI > MIDI OUT > Start: 1st Recording)
- Sending Stop every time you transition to an empty part (works well for Autoquantize) [Settings > MIDI > MIDI OUT > Send Stop at Empty Part]
Important note: When using the BeatBuddy and sending out Transition commands to the BeatBuddy from the Aeros, this will only work if the BeatBuddy has Transition Forgiveness on. This is only available in the latest beta of the BetaBuddy Firmware v4.1.3.
3. Auto Record
Starts your recording from a stopped state once the input audio signal meets a specific threshold. This is useful if you are having trouble starting to play at the same time that you are pressing the Aeros record button.
When this setting is on, the Aeros action button will say “Arm” instead of “Record” when stopped. This works for overdubbing from a stopped state too. Press the button to Arm the Aeros and play to begin recording/overdubbing.
There is no effect on the recording/overdubbing behavior during playback.
Set the Auto Record threshold in the Behavior Settings to control what audio level triggers recording.
4. Hands Free Slide Out Menu
The Aeros has entered a new age of Hands Free access to almost all aspects of its use!
While in the Loop Studio screen, holding down the left bottom button will cause a slide out menu of options to appear. This will give you many new capabilities to do hands free. If you don’t want this new system and just want the mixer to appear, you can turn off the hands free slide out menu in the Settings (Settings > Hands Free)
- Hold the bottom left Aeros button to engage the Hands Free Slide Out Menu
- There are two menus, Playing and Stopped: This gives you different options during playback or while stopped
- The Slide Out cannot be brought out while recording or overdubbing
- The individual options can be edited (reordered or shown/hidden) in the Hands Free settings
- Playing
- Mixer
- Switch RPO/ROP
- Undo
- Mute
- Reverse
- Solo
- Fade To Mute
- Lock Track
- Unlock Track
- Sleep Screen
- Stopped
- Save Song
- Clear Song
- Delete Last Part
- Open Album
- New Song 2x2
- New Song 6x6
- Mixer
- Switch RPO/ROP
- MIDI Mode
- Lock Track
- Unlock Track
- Copy Song
- Home
- Song Settings
- Previous Song
- Next Song
- Sleep Screen
- Playing
5. Hands Free system and Redesign
Almost the entire Aeros has been redesigned to support Hands free usage!
Home screen
You can now scroll through the options using the wheel, and can select an option using the Aeros right button. The bottom left Aeros button will make a New Song (based on the last saved song parameters). The Middle button will open the Memory Locations for Songs.
Loop Studio Stopped Screen Redesign:
Page 1:
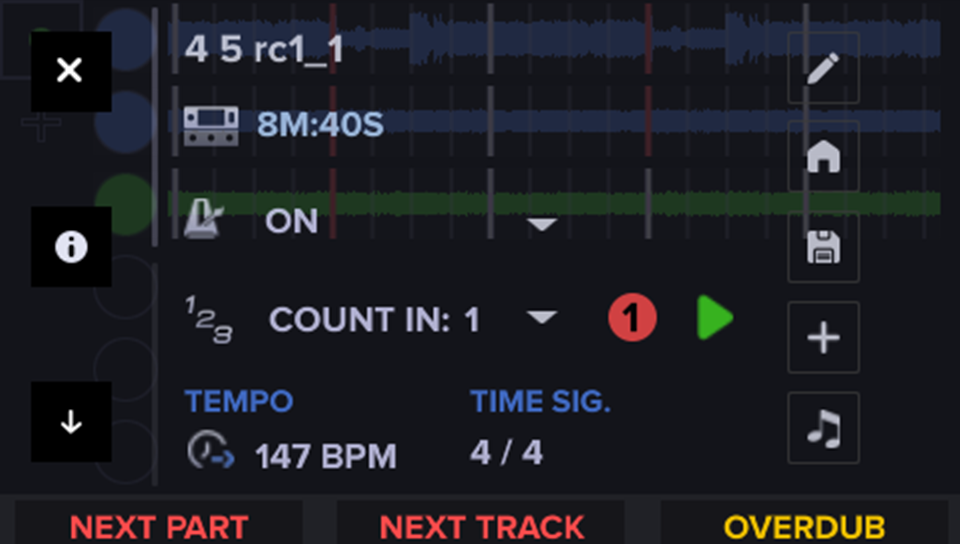
You can now control certain settings directly from the stopped screen:
Page 1:
- Icons
- Edit Song
- Home
- Save
- Create Song
- Songs
- Metronome
- First Track, On, Count in, Off
- Count in
- Set the amount of measures of count in
- Record and/or Playback: Whether count in will occur before just recording and/or playback begins
- First Track record: Only will count in when about to record the first track in a song part (indicated by the number 1 in the red circle)
- Use the touch screen to edit!
- Tempo
- Shows if sending or receiving MIDI Clock
- Turns red if there’s mismatch (internal BPM of song doesn’t match incoming external BPM, can cause a desync)
- Time signature
Page 2:
Page 2:
- MIDI Mode: Transmitter (Master) or Receiver (Slave)
- MIDI In: Start
- Record and/or Playback: Whether Aeros begins Recording and/or Playback when receiving a MIDI Start command
- Use the touch screen to edit!
- MIDI Output
- Merge/Thru/Out/Off
Albums and Songs
All Aeros songs are now inside folders called ‘Albums’. Albums can be named and can have songs within them organized by Date, Name, or ‘Track’ (in a Custom Order). Press the 3 dot menu in the top right or hold the bottom left Aeros button to open up the Songs Slide Out Menu and change the track order.
Songs List is now just called ‘Songs’, you can find the Songs page inside every album. Inside the Song page you can press and hold the bottom left Aeros button to bring up a Slide Out Menu for the Songs.
You can scroll through all options (Albums/Songs) using the wheel and can interact with the selection using the buttons. The right Aeros button will open a selected album or song when it is tapped.
If you hold down the right Aeros button while selecting a song it will engage multi-select mode. Multi-select is also available as an option in the Songs Slide Out Menu.
While multiselect mode is enabled, you can tap the Middle Aeros button to Move a song or multiple songs. If you hold down the Middle Aeros button, the song(s) will copy.
Copy and move are also available as options in the Songs Slide Out Menu. If multiselect mode is not enabled, choosing one of these options in the Slide Out Menu will affect just the currently selected song in the Album.
You can delete an album by pressing the Trash icon when the album is selected
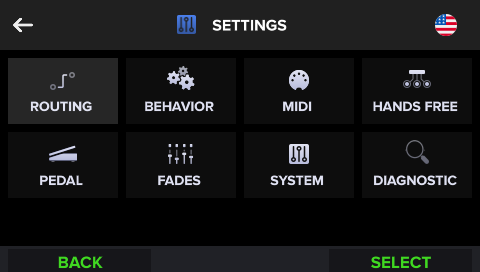
Settings
We have Organized all the Device settings into categories:
- Routing
- Behavior
- MIDI
- MIDI IN
- MIDI Out
- Hands Free
- Pedal
- Fades
- System
- Diagnostic
All settings are now accessible hands free with the wheel and toggle options of the currently selected setting using the right Aeros button.
Any slider settings will allow you to ‘Edit’ the value with the right Aeros button to activate the slider. Then using the wheel, you can set any value. Tapping the bottom left Aeros button will cancel the change and tapping the right button will confirm it.
The same is true for any settings that have +/- integers like the Time Signature song setting.
Tap the middle button over any selection in the settings pages to get info on the setting.
6. Backing Tracks
You can now load backing tracks into the Aeros!
Once you boot the Aeros with the SD card inserted for the first time, it will reformat the empty SD card or ask you to convert existing files (Read Bottom of Forum Post First)
Once formatted, the SD card will have a Backing Tracks folder which you can drag and drop your files into.
The Aeros will only support .wav (PCM) files that are 44.1kHz and 24bit. They can be mono or stereo.
To import a file, you must be in an empty song or create an empty song that is in freeform mode (we plan to make backing tracks compatible with Autoquantize and Quantize mode soon). If you wish to import multiple tracks per part, you must turn Sync Tracks off. If you wish to have sync tracks on, you can only import one backing track per part into the first track.
Backing tracks must be loaded sequentially starting with the first track.
We may expand the possibilities for file formats and sync rules later but this is a great first step.
How to Load a Backing Track:
- Click the pencil icon to edit the song
- Make sure you have Song Grid Mode set to freeform. If you want to import multiple backing tracks per part, you must have the Sync Tracks setting off.
- Note: You cannot change the Song Grid Mode to freeform and then load the file, first change the setting, hit save, open the edit screen again, and then start importing tracks.
- Scroll down and select Load File with your finger on the touchscreen
- Choose a file from the list using the touchscreen. This can also be done using the wheel to change the selection and the right Aeros button to choose an option.
- Once selected, you will return to the song settings screen, click Save in the top right to load in the backing track.
- Repeat steps 3-5 to load multiple backing tracks into a song part
Note: If you want to import multiple backing tracks per part, you must have the Sync Tracks setting off before you start importing.
7. Fade Time
Fade settings are now their own category in the settings menu, you can also now set Start, Stop and mute/unmute fades to a custom time (1-60s) independently. Set to ‘Timed’ to choose a value from 1-60 seconds.
If set to Auto:
- The Start will fade in according to the longest loop in the current part
- The Stop and Mute/Unmute will follow the Stop and Mute/Unmute behavior setting for length (End of Measure, End of Loop, Immediate)
8. Expression (EXP) pedal setup
A brand new Expression (EXP) pedal setup page was added to the settings menu. Follow the steps on-screen after pressing “Calibrate” to set up your connected EXP pedal.
The EXP pedal controls the Aeros Main volume
9. Offscreen Actions
There is now a way to know when pending offscreen actions are coming. A small bar with the same color as the upcoming event banner will fill from bottom to top along the height of the track. For example, if you set a long track to mute at the end of the track, you will see a gray bar rising on the right side of the track until the Mute banner appears.
10. Count In Revamp
Count in settings have been simplified and expanded
Set count in to play when starting either during Recording and/or Playback from stopped.
If Recording is enabled, you can also enable Count In (1st Track) so it is only counting in when recording the very first track in a song part, not when recording other tracks from a stopped state.
Count in can now be set from 0-99 measures, if set to 0 there will be no count in.
11. USB access to Internal Memory
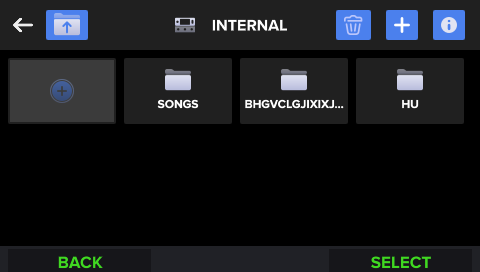
You can now access the internal memory of the Aeros on your computer through the USB port, making backing up your songs an easy process.
To access the internal memory: With the Aeros powered OFF, connect it to your computer via USB and then power the Aeros ON.
-
Do not connect the Aeros while powered ON or the memory will not be accessed until it is rebooted
-
To access the SD card, insert it in the SD card slot before turning the Aeros on while it is connected to your computer via USB.
12. Log Improvements
We now have 5 log files instead of 2 and include a lot more information when the
Active Logger is on. This is very useful for us when investigating weird bugs!
Note the Active Logger being on uses a lot of CPU which could cause pops to be heard and/or written to the recording, so only turn it on when troubleshooting.
13. Copy song
You can now copy an Aeros song! This is useful when you want to experiment by creating different versions of the same song.
This is possible to do in the Songs screen (inside an album) or within the Loop Studio by using the Slide Out Menu when stopped.
You must save a song before the changes will be copied. Unsaved progress will not be copied.
14. On Screen notifications for Received MIDI Commands
The Aeros will display MIDI commands it has received that are switching settings On or Off.
Currently this only works for switching ROP mode to RPO mode and vice versa.
15. Default naming convention
Change the default name for every new song on the Aeros to be a custom name, the change will take effect after editing the setting and making a new song. Old songs will not be affected.
16. One press song part change
Change the song part in 6x6 just like the song parts in 2x2, with one tap to transition. The parts work like the tracks in 6x6, when selecting an empty part, a recording will be cued in the empty part.
If you tap Next Part again while there’s a pending transition to an empty part the first part will be selected again and transitioned to.
Keep pressing the Next Part button to toggle through the song parts sequentially.
It is suggested that you set the Change Parts behavior setting to End of Loop to get the most of this setting - that way you have time to select different parts before the transition occurs.
17. On screen labels as buttons
You can now tap the on-screen button labels using your finger! The response is not as good as the physical buttons for multiple taps but works well for the first tap.
18. Multi time signature/tempo
You can now have songs with either multiple tempos (one per part), time signatures (one per part), or both!
19. Auto record next track toggle
Turn off the Automatic recording function in 6x6 when selecting an empty track, instead you will have to manually start a recording once the empty track is selected. Settings > Behavior
20. Loop Decay
The Loop Decay will decay the track’s base layer every time a new overdub is started by the amount set in the Decay Rate. If you set the decay rate to 50%, the base track will decay by 50% or become half as loud when an overdub is started. If you set the decay rate to 100%, the base track will decay by 100% or be totally silent when an overdub is started.
This is a destructive audio process. The decay process cannot be reversed. It is recommended that you save and copy a song before adding loop decay to it to avoid decaying and losing any old recordings.
The Loop decay will only engage when a new overdub layer is started, the loop decay does not apply at every loop seam.
Loop decay is able to be turned on and the decay rate can be set in the song settings. Currently the decay rate cannot be changed without stopping audio and saving the song.
Updating to version 5.0.0 (or later)
If you are currently on a version earlier than 5.0.0 and you have previously recorded material stored on your Aeros’ internal memory and/or the SD card, you should read the following instructions to ensure a smooth update process.
We have updated the file system, the metafile, and more in this version. You will not be able to open songs recorded or altered in 5.0.0 using any previous version. If you open a song recorded on a previous version and record to it with version 5.0.0, it may also no longer work in previous versions.
For this reason, when first loading the new 5.0.3 firmware, you will see a pop-up that asks you to either convert your existing songs or not. If you are unsure, hit NO to prevent conversion. Before converting, please back up your music if you haven’t already (read ahead in this section for instructions of how to do this).

To manually update to Aeros Firmware 5.0.3:
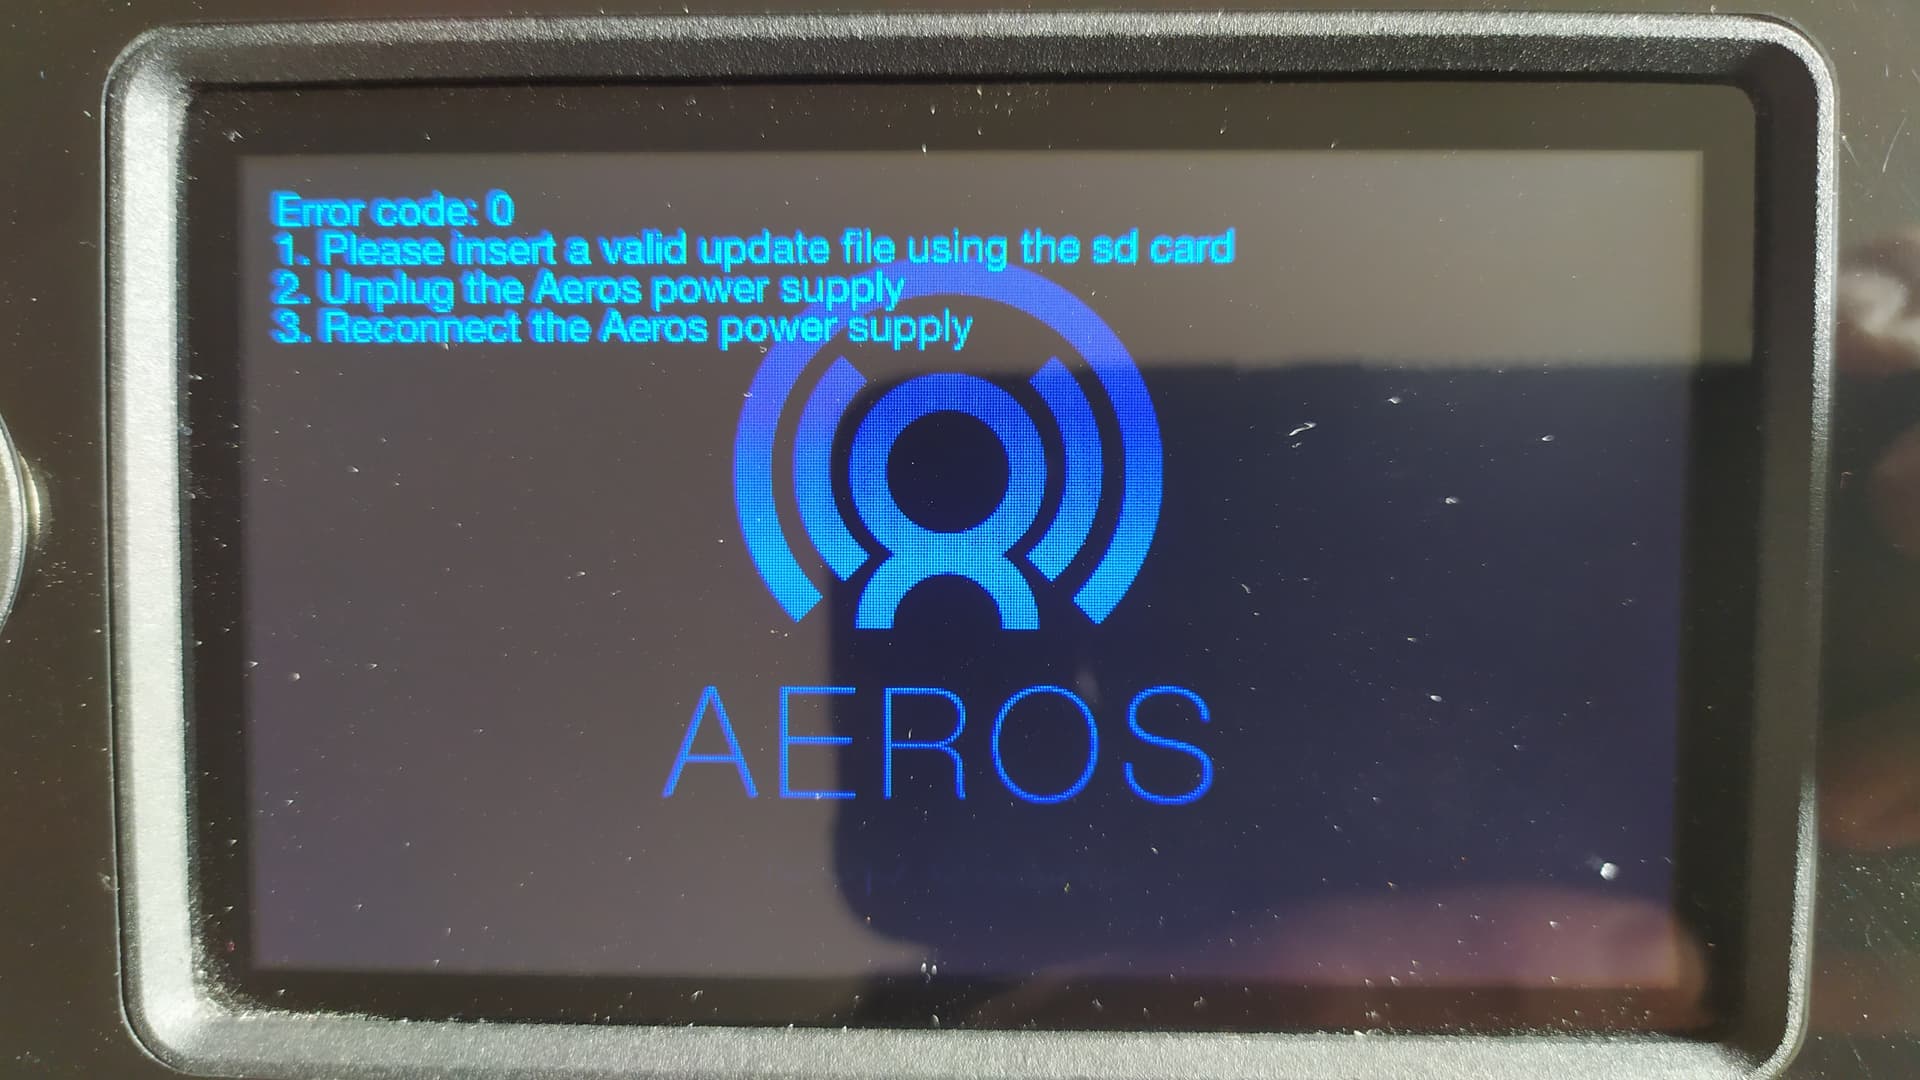
- Download the 5.0.3 update file here and place it on your SD card
- Rename the 5.0.3 update file to “aeros.bin” once it is on your SD card.
- Insert the SD card into the Aeros SD card slot while the Aeros is off, and turn the Aeros on. The Aeros will take about 10 minutes to update.
Easy steps to back up content quickly after updating to 5.0.0 (or later):
-
Once the update is complete and the Aeros boots the first time, you will see a pop-up asking you to convert your songs, press “NO”.
-
If you have not backed up your content yet, DO NOT HIT “YES”, THIS COULD CORRUPT your content if you choose to downgrade back to a version older than 5.0.0
-
Turn OFF your Aeros and remove the SD card
-
Connect your Aeros to your computer via USB and turn the Aeros on
-
Find the Aeros internal memory in your file explorer/Finder app
-
Drag and drop all contents into a backup folder of your choosing on your computer
-
(optional) For songs saved to the SD card: While still connected via USB, Insert your SD card into the Aeros SD card slot to access it from the computer, and follow the same process
Backing up pre-5.0.0 update
If you wish to backup your songs before upgrading to 5.0.0, you will need to move the internally stored songs to the SD card to enable you to transfer them to your computer.
In all Aeros versions 4.3.1 and prior there is no way to connect the internal memory to your computer. You can move the songs on the Aeros internal memory individually to the SD card pretty quickly by using the Songs List in 4.3.1: In the Songs List, tap the SD card icon to move the
songs that are saved to internal memory to the inserted SD card.
Conversion
The Aeros in 5.0.0 or later has folders within both the SD card and the Internal Memory called Albums
- On converting, all your existing songs present when booting up the firmware for the first time will be automatically moved into the new ‘Songs’ folder (within the ‘Albums’ folder) in each memory device (SD, Internal)
- If your SD card is empty, it will be formatted for the new firmware on boot up
To avoid losing material in the case of corruption post conversion, we have left all your old Meta files in their original place in the file structure.
How to Find Old Meta Files
On your SD Card/Internal memory when connected to a computer, you will see a folder called “Songs”. This is the old “Songs” folder, the new one will be nested inside the “Albums” folder.
You may want to create a backup of this old folder on your computer. Only copy the Songs folder on the root (the first layer/page) of your memory device when viewing in your computer’s file explorer app. Place the old Songs in a folder on your computer with a name to the tune of “Old Aeros Meta files”. They are very light, and should not cause any burden on your computer’s memory.
Please check out this Google Doc listing all the info text for all settings on the Aeros in 5.0.0. This info text is also available on the unit itself.
If you see any bugs , please report it to us so we can fix it! Please send logs to support@singularsound.com along with a video and/or a description of the bug. To learn more about useful information you could give us to better help you, please read this post on bug reports.
Version 5.0.0 Beta 1 Changelog
-
Stopped screen redesign with quick-access controls and info
-
Added hands-free slide out menu to use functions while stopped or playing. Hold bottom left button to activate slide out menu. Menu options are different depending whether Aeros is stopped or during playback. Options can be edited and rearranged in Settings
-
Added offscreen progress bars on right of screen for pending actions
-
Added songs list redesign with support for multiple albums for better organization
-
Added backing tracks (import system). Please Note: Imported WAV files must be 44.1 kHz and 24 bit
-
Added auto-quantize mode: Allows you to record the first track in a song part in freeform, and the Aeros will calculate and set the Tempo BPM based on the loop length. Time signature must be set in advance
-
Added per-part tempo and time signature in song settings: Enables different song parts to have different tempo and time signatures
-
Added auto-record mode: When enabled, while Aeros is stopped, you arm a track by pressing the Aeros footswitch button, but recording only starts when the input signal reaches the set threshold (adjustable in settings)
-
Added auto-decay: Lowers the volume of previous audio layers with each additional overdub. Decay level adjustable in song settings
-
Added MIDI Transmitter (Master) Mode: When enabled, Aeros sends out MIDI clock, Start/Stop, Transition and Time Signature commands. Individual commands can be turned on/off in settings
-
Added MIDI message filtering: Enables which MIDI commands it follows or ignores
-
Added support for additional MIDI commands: See manual or forum post for details
-
Added German language support
-
Settings redesign: Added categories for easier organization
-
Enabled Settings screen to be used hands free with the wheel and footswitch buttons
-
Added setting for screen brightness
-
Added many additional settings: See manual or forum post for details
-
Added improved logging for debugging purposes
-
Added sleep mode: Turns off the screen while keeping Aeros powered on. Access through hands free slide out menu
-
Added USB access to internal and SD storage
Bug Fixes:
- Many various improvements
Changelog 5.0.0 (from previous beta version)
- Added warning when low on disk storage space
- Reduced recording time from 20 minutes mono / 10 minutes stereo to 19 minutes mono / 9.5 minutes stereo to make room for new features
Bug Fixes:
- If using the Start: 1st Recording command set to Rec Start while MIDI Out Start is enabled it is not sending a MIDI start command when starting the recording.
- Transitions are jumpy when time signatures are not equal between song parts
- If loop decay is set to 100, undoing the 1st overdub will not bring the base layer back
- Undone Tracks are still audible if undone while recording in loop forgiveness zone
- When recording and committing a short overdub (up to 500ms) while Loop Decay is on, the overdub is not recorded, but the volume of the base layer is increased.
- Undo does not undo the loop decay of first base layer if overdub is undone within one cycle of the loop
- MIDI Save command CC:33 value 0 is active even when playing back or when the song is already saved
- Aeros does not respond correctly when receiving tempo in x/8, x/16, x/2 time signatures as Receiver
- Redoing the undone first track in an Autoquantized song causes corruption
- Sending multiple Open next song (CC:43 value 10) / previous song (CC:43 value 20) MIDI commands causes error, the Aeros cannot handle multiple commands at once, it must go one by one.
- Incoming MIDI Song Select is not working
- With some settings, holding Play/Stop All, after clearing the song, it will auto play an empty song track
- Fixed expression pedal over-sensitivity randomly bringing the volume all the way down
- Many various improvements
Changelog 5.0.1
Bug Fixes:
- Playback audio pops improved
- Optimizations for smoother audio/visual performance
- Fixed text translations (for languages other than English) that were not fitting on-screen correctly. (If you notice a translation that cannot be fully seen or could be improved upon please report/suggest on the forum or to support@singularsound.com)
- Aeros will no longer allow editing settings after recording the first track in part 1 if editing those settings can cause corruption
- Loop Forgiveness zone (LFZ) will now be respected if Change Parts is set to End of Loop and you try to change parts during playback at the longest loop’s seam.
Changelog 5.0.2
Bug Fixes:
- When using CC:113 MIDI command and the Auto Song Part Change (6x6) setting is on, the Aeros will no longer start a recording in the upcoming part automatically when switching parts
- Switching through more than 1 part in a row while auto song part change (6x6) is on and thee transition has already started will no longer automatically start a recording in the next part
- Improvements to playback audio pops
Changelog 5.0.3
Bug Fixes:
- Fixed issues with undone tracks when saving the song
- If Mute/Unmute fade is enabled, the Solo command causes the soloed track to “fade” visually and the fade visual goes away correctly
- If the time signature is already set for an Aeros song and the BeatBuddy (or 2nd Aeros) sends a new time signature message, all parts will update correctly.
Known issues:
- If Count In Record is off, the Aeros will not start recording in sync with a Master clock (like the BeatBuddy) after it is stopped and a recording is started from a stopped state instead it starts recording immediately. If Count In Record is on but the count in is set to 0, this will work correctly.
- If Count In Playback is off, the Aeros will not start playback in sync with a Master clock (like the BeatBuddy) after it is stopped and playback is started from a stopped state, instead it starts playback immediately. If Count In Playback is on but the count in is set to 0, this will work correctly.
- After manually editing the time signature, the Aeros only updates to a new time signature if the BeatBuddy (or 2nd Aeros) starts sending a different time signature command. Normally, the Aeros would update as soon as it receives a time signature command if the current time signature is not the same.
- You cannot edit parameters of a song while importing a backing track, the song could corrupt once the file imports. Edit the parameters first, then import the backing track.
- Loop decay fails to apply if you start overdub at the moment a previous overdub was started